When I had made a few quilts, and decided that it was something that I’d like to carry on with, I mentioned to my two children that I’d love to make them each a quilt. It had to be something that they chose and, ideally, I hoped that they would participate in the making. That’s my practical side coming through – a quilt is a lot of work and I wanted to know that it would be loved and appreciated.
My son came up with an idea but was hesitant to share it with me, as he felt it was a tad complex. “Tell me,” I said, “how hard can it be?” Braden gave in and told me that he wanted a quilt that looked like the cover of Pink Floyd’s Dark Side of the Moon album. This one:

Not one to shy away from a challenge, I thought it would be fun to take this on. Together we drew, shopped, measured, cut and pieced. The black background is strips sewn together. They’re either 4″ or 6″ wide, (I can’t remember and the quilt isn’t here). We cut the background and inserted the white band and the rainbow. The centre triangle is black in the middle with graduated greys on the perimeter. It was made separately and then sewn on. We were super happy with the result.
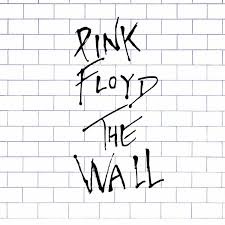
Little did I know that the complex part of the quilt was yet to come. This had all been just a warm up exercise! Check out the photo of Pink Floyd’s Wish You Were Here album cover. This one:

Yup, Braden wanted this on the flip side of his quilt. How did we do it? Slowly, thoughtfully and with a great deal of patience. Braden made a full size 6′ x 6′ drawing, which we divided into 4″ horizontal strips. Each strip was traced onto freezer paper, then numbered and colour-coded, so we’d know what pieces to join together. Here’s what one strip looks like:
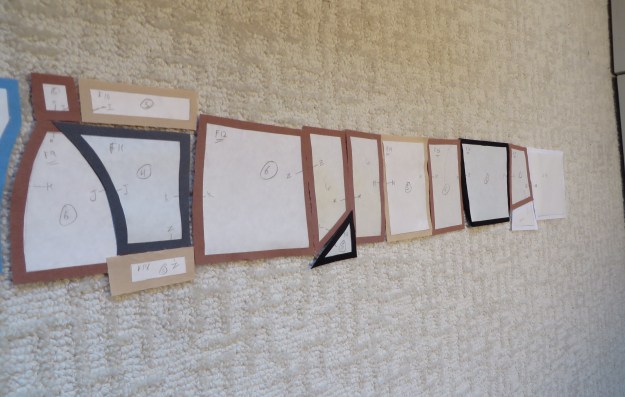
We added 1/4″ for seam allowances and then stitched each horizontal row together. We pressed each seam as we went along and there were several instances of ‘unsewing/resewing’, especially with the small, curvy pieces. As each horizontal row was completed we added it to the one above, to make sure we were on track. Here’s a photo of the first few assembled rows:

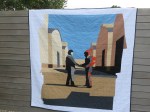
It was very fun to watch as it all came together. Braden added the jagged side edges and I think it makes a unique statement. Once the top was assembled we made appliqués of the two men and fused them to it. The appliqués were then stitched on using a satin stitch.
We cleaned up the loose threads, straightened the edges, layered it into a quilt sandwich and decided to carry on with the Pink Floyd theme and quilt it like the cover of The Wall, this one:
Braden had helped with all aspects of the design and construction of this project. But, by the time we got ready to quilt it, he had to move away for work. I got the quilting done and finished it off with a narrow black binding and a label.
What a sense of satisfaction! Sure, there are lots of things that I’d do differently, so as a learning experience it was invaluable. Best of all, it was a way to spend time with Braden; problem solving, sharing my craft with him and creating memories.
Click on any of the photos below to get enlarged views of the finished quilt.
-

- ‘A’ Side
-
- ‘B’ Side
-
- Label

Such beautiful quilts, I look forward to seeing more and hearing the stories behind each one.
LikeLike