Tag Archives: own-design

Front Page

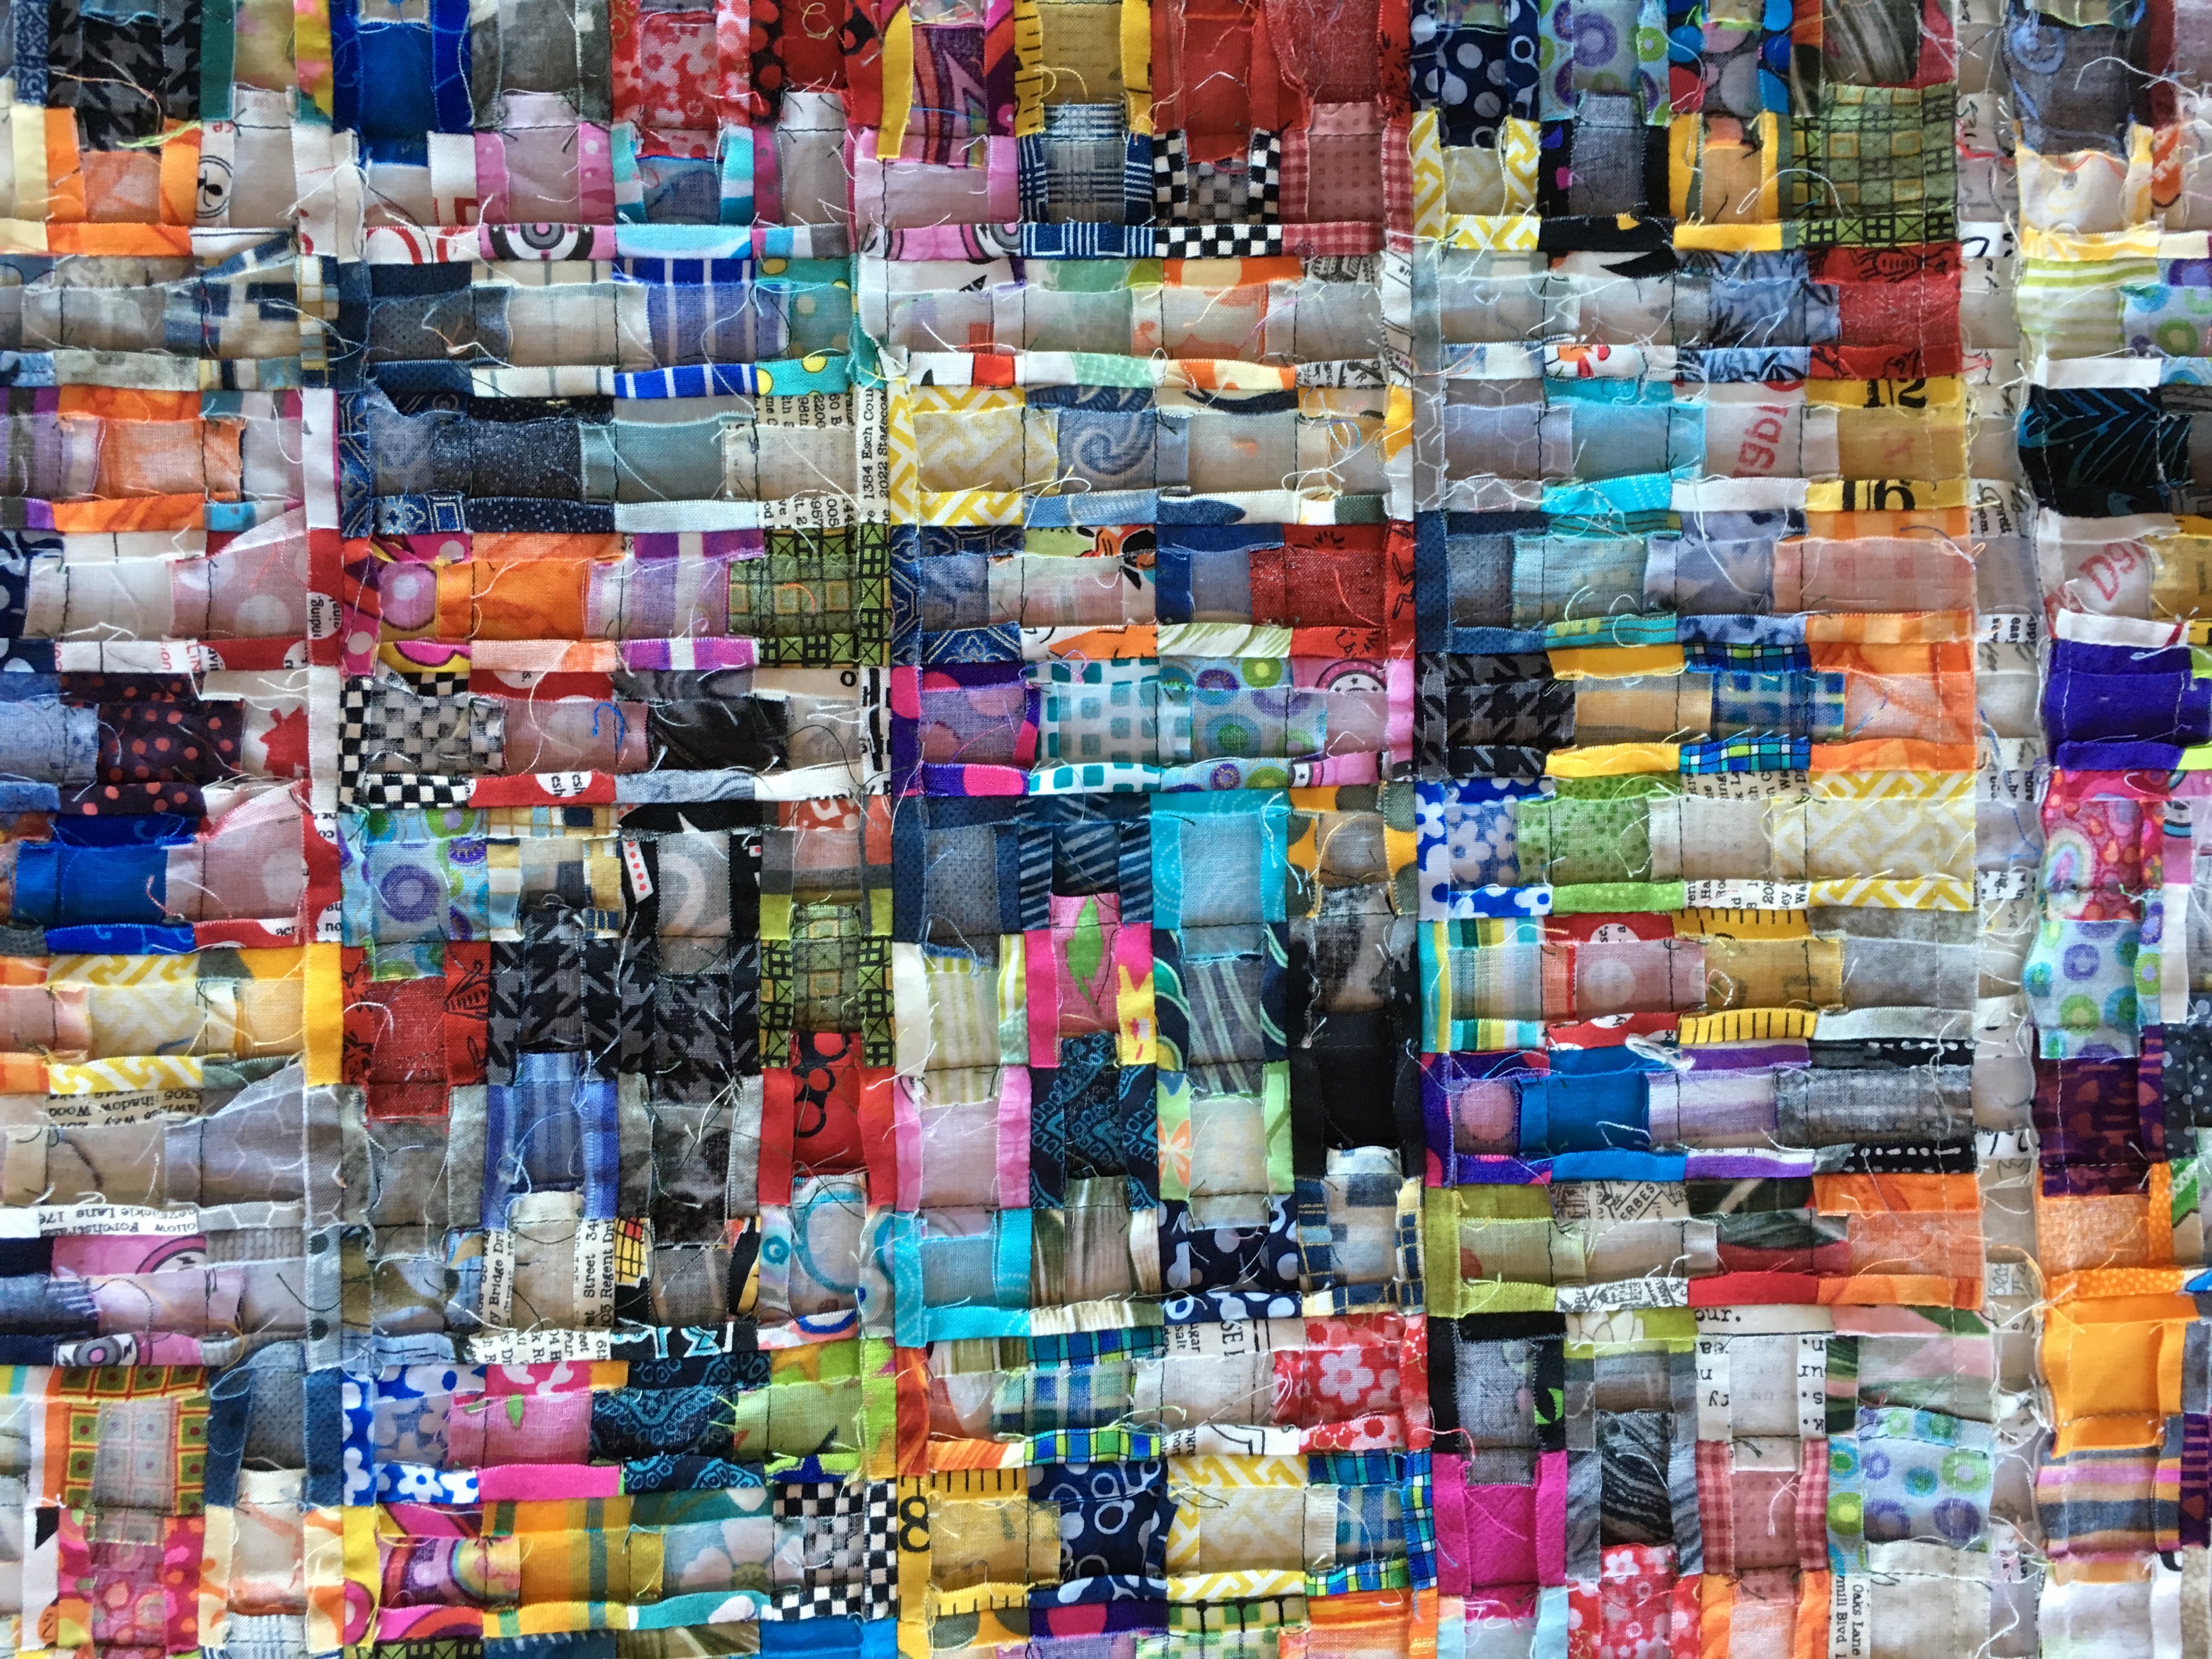
In previous posts I’ve mentioned that I love words and language.  For a long time I had an idea of making a quilt that had the look and feel of a newspaper page.  For several months I collected fabric with text and interesting images and then began drawing up a pattern on large sheets of 1″ graph paper.

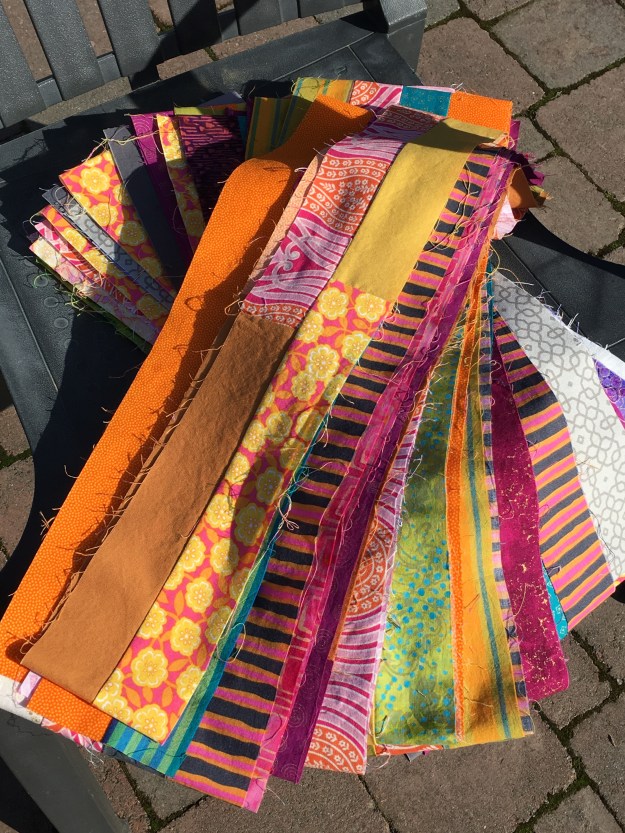
Once the pattern was done I began the fun work of cutting out the pieces.  I paid attention to colour balance and made sure that repeat pieces weren’t too close together.   Each piece was labelled with a number that corresponded with the graph paper pattern, then trimmed with a narrow cream border.

Assembly took place at the Denman Quilters’ Retreat on Thetis Island, in 2014.  Most of the blocks went together easily and in a logical sequence.  With some I had to sit back and think ‘what goes where, and when?’  Gradually it came together, but it felt to me that something was missing.  Fortunately there was enough leftover red text fabric to add a border.

The backing fabric was narrow and required a seam.  To disguise the seam I used leftover strips from the front of the quilt.    If you enlarge the photo of the backing you’ll see that the left side black/cream is all one piece but the right side black/cream is made of many horizontal strips sewn together.  Because the print is so small those seams appear less obvious.

The quilting is a series of fractured, random straight lines.  I thought this would be quick and easy, but soon found that that was not the case and I had to keep adding lines to make sure that the unquilted spaces weren’t too large.  The border is plain black, attached by machine and finished by hand.  The finished size is 62″ x 72″.

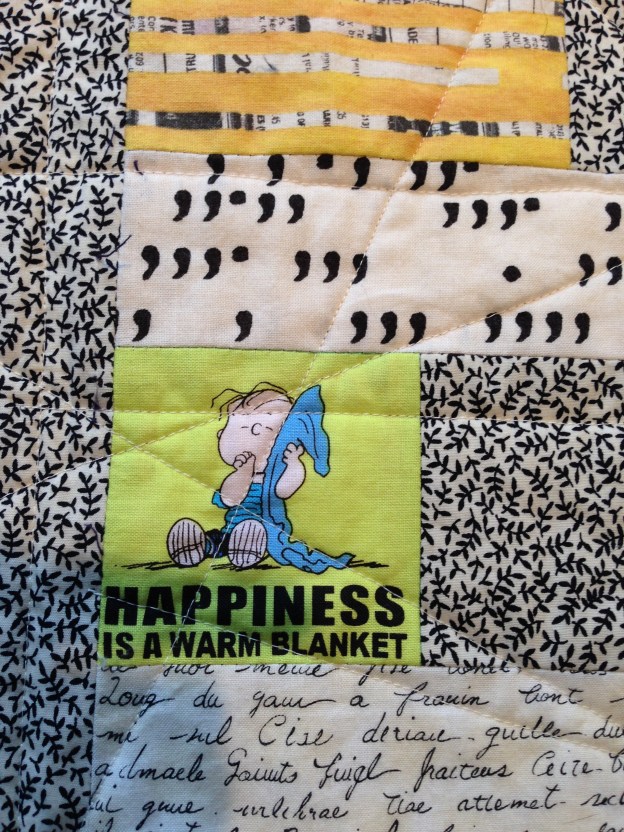
While there are things that I would do differently, I was really pleased with how this quilt turned out.  There’s a large stack of text fabric in my stash and a companion quilt is not out of the question.  Here are photos of the front and back of Front Page.

Thanks for reading.

Advertisement

4761

Correction from a previous post in which I said that the finished postage stamp quilt would have 4,791 pieces.  In fact, it’s ‘only’ 4,761!  And, it’s all done!  This quilt has been in the works since last Christmas and has been a fun thing to pick up and work at in between other projects.

There are 16 blocks of 16 x 16, or 256 1″ squares.  The pieces were drawn randomly from a large bin.  If I grabbed two that were the same I swapped one out, but otherwise there is no pattern.  I joined the pieces in twos, then made those twos into fours.  Next, I took four of the fours and made them into a block.  These blocks were trimmed to 4 1/2″ square.  Usually I set out to make eight of these squares in one setting.  When I had 16 of them I made them into the 16 x 16 block.

The iron was busy throughout; there are so many seams!  It took some experimenting to find the best pressing pattern.  For instance, all of the four piece strips are pressed to one side and then they nest well when joined.  In places where there is a lot of bulk the seams are pressed open.  Here’s a photo of a section of the back of the quilt.  It looks crazy, but there was a method!img_2894

The sashing is more of the 1″ pieces, all cream with text.  Once the sashing was on I felt that it needed a border so added a narrow strip of Moda Grunge in grey.  This quilt has enough going on, on the feature side, that I felt the back should be pretty calm.  At The Red Barn in Courtenay I found an extra-wide black fabric that has the names of colours written in white.  As it was extra-wide I didn’t need to piece it and I thought the colour names fit perfectly.

I used Superior King Tut thread, in gold, red, orange and grey for the quilting and did a series of wavy lines that run from side to side over the small pieces.  The border is quilted separately with five narrow lines, using the same thread colours.  The binding is a black cotton with white dots of various sizes.  It was attached by machine and finished by hand.  The label went on and then the quilt went through the washer and dryer.  I’ve been using Forever New detergent for my quilts and love the way it makes them feel and smell.

This was a very fun project and I’m thrilled with the end result.  It’s just a riot of colour!  Here are front and back pictures of 4761.  Click on the picture to enlarge.

img_3229

img_3237

Thanks, as always, for reading!

Christmas in July

It’s not really Christmas, although the summer weather has been a bit chilly this month.  We’ve seen single digits, lots of rain and some high winds.  Today is a perfect day for the 5th annual ‘Ewe da Best’ golf tournament, which is held on a local sheep pasture.

Last summer I participated in my first webinar, called ‘Wedge Quilts Go Modern’.  It was put on by the Modern Quilt Guild and the instructor was Christina Cameli.  Christina showed us how to use a wedge-shaped ruler to cut strips of fabric.  Yes, it could be done without this tool, but it would be more difficult and I don’t think the results would be as accurate.  We learned how to join the strips and ways to work with the hole created in the centre of the strips.  (In my quilt the white circles fill in that hole.)The webinar also covered making pieced strips, fractured strips and negative space strips.  Webinars are a terrific way to learn a new skill, without having to leave home.  You could even be in pj’s having a glass of wine!  Here are some wedge rulers.
M-004-trio-lineale-doheny

Without an end in mind, I made the three circles last fall.  Then they sat.  After a couple of months I added them to a white background.  They are appliquéd on using the blanket stitch on my machine.  At the same time, I made the backing, using bits and pieces of reds, greens and whites.  I squared up the top and the backing and then put them away until May.  This is the second quilt that I’ve done this way and it seems that taking a break from them makes them exciting again.

I made a quilt sandwich with the top, the backing and bamboo for the batting, but wasn’t sure how to quilt it.  In the end, I started with the three circles and did a pebble pattern in each of the coloured spokes using Superior King Tut thread in White Linen.  The white spokes are not quilted so they puff out a bit.  The grid pattern is random and I used the same thread in Limestone, White Linen, Cheery Red and Holly and Ivy.  The binding is a great fabric that I stumbled on in Fabricland.  It doesn’t show well in the photos, but it’s Christmas candies in all of the colours that are in the quilt.  The finished quilt is approximately 60″ x 60″, perfect to curl up with on Christmas morning.  While I love it, I am going to put it up for sale in the Denman Island Studio Tour August 6 and 7.  Here are some photos; you can click on them to enlarge and see captions.

HO! HO! HO! and thanks for reading.

Start To Finish #4 – The Back

I have such trouble with the back of a quilt.  The front comes from an idea or a pattern.  I have fun putting it together, and it almost always works the way I’d hoped.  The back is hard because I feel that it should be as good or as interesting as the flip side.  It should be worthy of being seen, not ‘just the back’.

My current colours of India quilt is exciting, vibrant and bright.  I was thrilled to find three fabrics for the back that I thought would be complementary.  They had an Indian feel; with paisleys, swirly flowers and gold threads.  I washed and pressed them and then fooled around with a layout.  It was all carefully measured and well sewn/pressed.  But it was awful!  Almost so bad that I don’t want to share it, but here it is:

What’s wrong with it?  There’s too much going on.  Any one of the fabrics on their own would be fine, but not all three.  The orange with gold flower would have been awesome.  Also, it’s pieced that way because I didn’t buy quite enough length – because I didn’t have a plan.  (This is a mistake that I’ve made before and hope not to make again.)

Here are some backs that I’m happy with:

There’s some interest, but they don’t steal the show.  If the quilt ended up folded over or upside down it wouldn’t be a bad thing.  The piecing is necessary because fabric isn’t usually wide enough to back anything more than 40″.  Adding bits and pieces disguises the seams.

Returning to the quilt of the moment – the colours of India.  I bit the bullet and went in search of all new fabric for the back.  I had great help in one of the local shops.  The clerk and I found the perfect fabric, but when he went to cut it, we found a flaw ran through the entire bolt.  (I was shocked when the manager said that she knew it was flawed, but was prepared to sell it at full price, without flagging it as flawed.  hmmmm.)  I had better luck at another shop and made my purchase.  It’s been washed, dried and pressed.  Tomorrow I’ll piece it and then, with Blake’s help, I’ll pin the top, the batting and the backing together.  Then it will go away for a bit while I decide how to quilt it.

I’ve just reread this post and feel a need to add a disclaimer of sorts.  The back of this quilt won’t have different colours or fabrics.  It will be all one fabric with seams that won’t be disguised with bits and pieces.  What I’ve chosen just feels like the right thing, all by itself.  There won’t be a third attempt.

Stay tuned for the next post, which should be the final one for this project.  It could be a while.  In the meantime, I’m trying to think of a name for this quilt, other than ‘Colours of India’.  I like ‘Memories of India’ but President’s Choice has a line of marinades – ‘Memories of Korea, Szechuan, Tuscany, Argentina’ etc – so that won’t work.  I welcome any suggestions.

Thanks for reading.

Start To Finish #3 -Assembly

In the last progress report, on the colours of India quilt, I had cut out what I’d hoped were enough 2″ strips to make a quilt top that measures approximately 80″x 80″.  Those strips were set aside, waiting to be stitched together at my annual quilt retreat.

Retreat began last Monday afternoon.  I spent the first afternoon and evening working on another project, wanting to be fresh for this one.  Bright and early Tuesday I got the pile of strips out and sorted them by colour.  Then I started stitching them together, end to end.  There was no pattern; I just tried to keep them mixed up a bit.  The next step was to take this very large strip of 2″ fabric and cut it into 60 x 80″ widths.  So far so good, and it moved along quickly.  Here’s the pile of strips joined end to end:IMG_2176

Then came the tedious part.  I paired up the strips and sewed them together, creating 30 strip pairs.  Then those pairs were joined together, creating 15 quad strips.  This continued all afternoon and into the evening.  Each 80″ seam needed to be pressed.  Throughout this process I resisted the urge to see how it was looking.  It was all random and I just crossed my fingers and hoped that I wouldn’t end up with 20 pieces the same in one place.   Here are the 30 pairs of strips:

IMG_2195 3

By mid-day on Wednesday the top was assembled and I folded it up and set it aside for that evening’s show and tell.  Honestly, I was afraid to look at it.  The colours are bright and bold and I thought it might be garish, tacky or just plain ugly.  At show and tell I explained that I’d wanted to recreate the colours of India in a quilt.  It was well received and the comments were positive.  Two of the gals held it up so that I could have a good look and I was thrilled.  It was just as I’d hoped, only better.  Here’s the completed quilt top:IMG_2198

On my way home, after retreat, I stopped at The Cloth Castle in Langford to look for fabric for the back of the quilt and found three perfect pieces.  Better still, they were in the markdown section!  I’ve got them washed and pressed and am thinking about how to put them together in a way that will complement the top.

I’m really excited to see this one coming together.  It’s joyful and brings back such fond memories of our special Indian adventure.

Thanks for following.  Comments are always welcome.

Start To Finish #1-The Idea

IMG_2141

My slate is almost clean and I feel that I can comfortably start a new project.  The timing is perfect as it’s just three weeks until our guild has its annual quilt retreat.  I’ll post more on the retreat later, but basically, it’s four days where all we do is quilt, eat and sleep.

I like to go to retreat with my project planned and my cutting done.  With 40 women, you can imagine that there’s lots of distraction; not always conducive for concentrated thinking.  We will have shared cutting tables set up, but I wouldn’t want to hog one of these by cutting a whole quilt.

This post is the first in a series that will follow a quilt from idea to completion.  Each post will be titled ‘Start To Finish’ and will be numbered.  You will be able to go back to previous posts via the Archives.

Since visiting India in 2013, I’ve wanted to make something that reflects the colour and chaos that surrounded us.  Here’s a link to the blog that I kept during that trip:  Samosa Sojourn .  I’ve been collecting fabrics and tossing ideas around.  Yesterday I laid out the pieces that I’ve found, then I culled the ones that didn’t work.  It’s a good collection that includes brights from saris and markets, greens from tea plantations and rice fields, rusts  and greys from the soil and the buildings.

I’ve been having trouble deciding how to put all these fabrics together.  I want there to be  confusion and busyness, as that’s how India is.  But, there’s also such calm and beauty – how to represent that?  I thought back to an own-design quilt that I made last year.  (You can see it if you click ‘Finished Projects’ on the right side of the blog, it’s called Read Between the Lines.)  It uses three different strip widths – 2″, 4″ and 6″. My mix of fabrics includes several muted solids and I hope that these will add a touch of calm to the riot of colour.  To spice things up a bit I’ll add some random, narrow vertical inserts.  With the amount of fabric that I’ve collected I should be able to make a king-sized quilt.

What a relief to finally have a plan.  Now it’s time to get the fabric washed and the strips cut out.  Can I wait 21 days to get started???

Thanks for following.


SWIM

Happy New Year!  I think I’ve got the blog organized to the point where I can start making regular posts.  There will be lots of tweaking as time goes on, but let’s get started.

I began sewing in junior high school.  My Mom and Grandmother were both accomplished sewers, knitters and needle-pointers, so it was no surprise that I carried on with fabric-type crafts.  I took home ec in high school and remember being called to the office to explain why my flannelette had hockey players on it, instead of fairies, princesses or other more feminine designs.  Dare to be different, think outside the box – both describe my persona.

This seems to have carried over to my new love of quilting.  I want to use my imagination to create and don’t want to be restricted to a pattern.  The quilt in the photos above was the sixth that I’ve made.  I swim a lot in a pool.  One day, while doing laps, I realized that the tiles on the bottom of the pool were laid out just like a quilt.  I began collecting blue fabrics with a watery look.  Armed with a large sheet of graph paper, a metre stick and some coloured pencils I drew up a scale version of three lanes of a swimming pool, complete with lane dividers.

The fabric was cut into 2 1/2″ squares, sewn together into rows and then the rows were joined together.  It didn’t look like much for a long time, but gradually it began to look like what I’d envisioned.  I added a white border, used a mixed blue backing and a black binding.  It’s machine quilted with a horizontal wavy pattern.

I think this is my favourite quilt so far because it is an own-design that reflects my love of sewing and swimming.  It’s very different and definitely outside the box!